
| 일 | 월 | 화 | 수 | 목 | 금 | 토 |
|---|---|---|---|---|---|---|
| 1 | 2 | 3 | 4 | 5 | 6 | |
| 7 | 8 | 9 | 10 | 11 | 12 | 13 |
| 14 | 15 | 16 | 17 | 18 | 19 | 20 |
| 21 | 22 | 23 | 24 | 25 | 26 | 27 |
| 28 | 29 | 30 |
- Actor
- 그라파나
- akka 강좌
- Adapter 패턴
- 하이브리드앱
- 스칼라
- 파이썬 강좌
- 안드로이드 웹뷰
- 이더리움
- Play2
- 주키퍼
- 스칼라 동시성
- CORDA
- 블록체인
- play 강좌
- 파이썬
- Hyperledger fabric gossip protocol
- play2 강좌
- hyperledger fabric
- Akka
- 스칼라 강좌
- 파이썬 동시성
- 하이퍼레저 패브릭
- Golang
- 파이썬 머신러닝
- 플레이프레임워크
- 스위프트
- 엔터프라이즈 블록체인
- 파이썬 데이터분석
- Play2 로 웹 개발
- Today
- Total
HAMA 블로그

http://www.mcublog.co.kr/1828
http://www.mcublog.co.kr/1841
http://recipes.egloos.com/v/5145182 펌 지퍄요 Gernel Purpose I/O 이야기. Embedded System에서 GPIO를 빼면 무슨 이야기가 되겠습니까. I/O는 Digital 회로와 외부 세계와의 통로이지요. Input/ Output이니까요. Digital회로는 혼자서도 잘 먹고 잘 살겠지만, 손발이 있어야겠죠. 그게 I/O라는 거에요. 보통 MCU에는 본연의 임무를 하는 pin들이 있는데요, 예를 들면, Hardware적으로 정해져 있는 CS라든가, WE라든가 하는 정해진 일을 하는 pin이 있는가 하면, 어떤 특별한 임무를 갖지 않고, User가 원하는 대로 I/O로 사용할 수 있는 pin들이 있어요. - 그런데, 재미 있는 건 GPIO가 특별한 functio..
 무들(moodle 2.9) - 이메일기반 인증 시스템 구축
관리자가 회원관리 ( 가입 ) 을 직접하는것이 아니라, 사용자 스스로 인증을 하기위해 사용합니다.이메일 기반 인증 시스템을 만들기위해서 2단계를 거치게된다. 첫째, 인증시스템 변경 * 사이트관리 - 플러그인 - 인증 - 인증관리로 갑니다. * 이메일 기반 인증에 관리모드 활성 눈모양을 클릭해서 켜줌. * 위와 같이 이메일 기반 인증으로 콤보박스를 바꾸어줍니다. 둘째, SMTP 서버 설정 싸이트관리 - 플러그인-메세지출력-이메일 로 갑니다. 위의 빈칸을 채웁니다. 저같은 경우는 대구대학교 무들 시스템을 만들었기때문에 대구대학교의 SMTP 서버를 이용하였습니다. 서버관리자분에게 SMTP 호스트와 SMTP 암호를 얻고 발신전용 이메일 주소를 만들어달라고해서 채웁니다. SMTP 서버를 직접 설치하여 사용할수도 ..
 안드로이드 와이파이 다이렉트(WI-FI Direct) 프로그래밍(3-1)
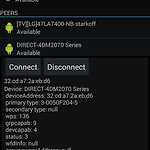
"기적을 부르는 안드로이드 통신 프로그래밍" 으로 공부한 내용 정리입니다.http://www.yes24.com/24/goods/9480788?scode=032&OzSrank=11. 와이파이 다이렉트란 ? 2. 와이파이 개발 일반 2-1) 와이파이 스캔 2-2) 와이파이 환경 설정 2-3) 와이파이 네트워크 연결 3. 와이파이 다이렉트 개발 3-1) 일반 3-2) 서비스 검색 3-3) 와이파이 락 과 멀티캐스트 설정 와이파이 작업단계 1. 단말기 검색 단말기끼리 서로 연결하기 전에 먼저 서로 단말기를 검색하고 연결하고자 하는 단말기를 서로 인식해야한다. 이때 데이터 링크 계층의 "프로브" 라는 프레임을 사용한다. 예를들어 단말기 설정내 "WI-FI Direct" 를 누르면, 단말기는 프로브라는 요청 프레임..
"기적을 부르는 안드로이드 통신 프로그래밍" 으로 공부한 내용 정리입니다.http://www.yes24.com/24/goods/9480788?scode=032&OzSrank=11. 와이파이 다이렉트란 ? 2. 와이파이 개발 일반 2-1) 와이파이 스캔 2-2) 와이파이 환경 설정 2-3) 와이파이 네트워크 연결 3. 와이파이 다이렉트 개발 3-1) 일반 3-2) 서비스 검색 3-3) 와이파이 락 과 멀티캐스트 설정 와이파이 스캔 - 무선 접속 장치 무선접속 장치에 접속하고자 하는 단말기들을 위해 ,무선 접속 장치는 비콘 메세지를 주기적으로 주변에 뿌린다. 비콘 메세지는 무선접속장치의 BSSID,SSID,무선접속장치의 속도 그리고 암호화 정보로 구성된다.- 클라이언트 수동적으로 비콘 메세지를 수신하여 주변..
 안드로이드 와이파이 다이렉트(WI-FI Direct) 프로그래밍(1)
1. WI-FI ? 와이파이 다이렉트란 ? 2. 와이파이 개발 일반 2-1) 와이파이 스캔 2-2) 와이파이 환경 설정 2-3) 와이파이 네트워크 연결 3. 와이파이 다이렉트 개발 3-1) 일반 3-2) 서비스 검색 3-3) 와이파이 락과 멀티캐스트 설정 WI-FI 전파거리 : 직선거리 200미터 / 벽으로 막힌곳에서는 대략 3~4미터 (1층~2층) 전송속도 : 최대 300Mbps ( 802.11n) 단점 : 블루투스에 비해서 많은 전력소모 / 전자레인지등과 같은 대역대라서 전파간섭의 가능성 다른 무선 통신 방법들 : 지그비 or Z-Wave 등 보통 가정에서 무선공유기를 주축으로 와이파이가 연결되어져서 사용된다. 무선공유기같은 AP 없이 기기들끼리 서로 제어하고 데이터를 전송할수있는 기술을 와이파이 다..
 Power Patch - 스마트 미터
우리주변에서 보통 전력량을 구하기위해서는 아시다시피 "계량기" " 전력량계" 를 사용한다. (1)전력량계란? 전력량계는 가정용 및 산업용에 사용하여 소비 전력량을 측정하는 계기로서 일반적으로 한 국 산업 규격 명칭으로 보통전력량계(Watt Hour Meter)로 표기되어 있으며 약호로 WHM로 표기합니다. 보통전력량계는 공급전압과 전류를 곱한 값에 시간이 가산됨으로 사용된 전력 량을 표시하는 계기 입니다. 전력량을 구하는 공식은 Wh(전력량)=E(전압)×I(전류)×cosφ(역 률)×t(시간)입니다. 전선을 연결할 필요도 없이 위에 가져다 붙히는것만으로 전력을 잴수있는 기술이 나와서 소개한다. o Persistent Efficiency : “Power Patch” October 7, 2014 - - The..
빈칸메우기 기본 구조:{ // 문제의 시작 1 // 등급 설정 :SHORTANSWER: // 문제 유형 ( 콤보형태, 빈칸메우기 형태 등등)~ // 여러답들이 존재하면 그 사이의 구분자 , 정답 다음에 오답들을 나타냄= // = 다음에는 정답이 온다.# // 피드백 메세지 } // 문제의 끝 간단한 예제 :{1:SHORTANSWER:=Berlin} is the capital of Germany. 1등급의 빈칸메우기 문제가 나온다 다음처럼 [ ] is the capital of Germany = 다음은 무조건 정답을 나타낸다. 고로 Berlin 이라고 빈칸에 적으면 정답. * San Francisco: {1:MULTICHOICE:=California#OK~Arizona#Wrong} * Tucson: {1:..